Creating an AR application with MRTK3

Dernière mise à jour : 20 janv. 2023
In this part of the year, we already used Unity for several projects, like the Platform game, the Roll a Ball project or the Tap to Place application. It was really fun to do, and we learned the basics (like Inputs, Scripts, Environment creation or Animations). However, thanks to the VAR master, we are able to practice on devices that are really modern.
This article will deal with a project that is compatible with the AR mask Hololens 2. Here, we used the MRTK toolkit for Unity that can help us to create this kind of application. The goal here was to do a little game where we control a plane, which must collect objects and avoid ennemies. In this article, I will present you my game, the difficulties that I had and the mechanics that I used. I decided not to follow the chronology of the creation because there will be redundancies, but I will describe all the scenes and what I used to make everything work.

Summary
Main Menu
When I said that this article will not follow the chronological order, I thought about this example. Indeed, for this project, I prefered creating a working gameplay before developing the different menus, because this latter is easier to do. In his article, I will start with that because it is easier to understand.
This step did not cause any problems, because MRTK makes it easy to create interfaces that we can interact with in 3D. For the main menu, I used a panel called "slate": it is composed of a title, a close button and a panel on which we can write. This prefab can be directly imported in the scene, the close button was already functional. So I changed the title and added the introductory text. Moreover, as I used the template directly created by MRTK, so it was already fully configured. So I didn't have to setup Unity to add hands, a camera or a character that can move for example. Finally, I added two buttons that came from the toolkit. These were not working, I had to configure them to take the user to the next menus.

Changing the scene by clicking on a button
The first difficulty of this project was to understand how to trigger actions when a button is clicked, as well as how to change scene. On my main menu, I wanted to have an access to the vehicle selection menu, and an access to the information menu. So I created an empty object called Game Manager, which contains a script that I named SceneManager.cs. The latter is composed of functions, each of which allows to go to the desired menu. Thus, the GoToMenu function, if triggered, loads the FirstMenu scene. So I need two functions for this menu: the GoToInformation function and GoToSelectVehicles. All the scene transitions are located in this script, which will be used in each of the scenes we will see later.

In order to make this script work, we had to configure the buttons. It's not very complicated, but it took me a long time to figure out what setting I needed to change on the button for it to work. Actually, all I had to do was go to the OnClick() part, and add an action. So I was able to drag the GameObject that contained the desired script, and select the function that we wanted to activate when the button was clicked. Here, for the button that leads to the information menu, I added the Game Manager, selected the SceneManager.cs script and finally chose the GoToInformations function.

This configuration was useful in all the buttons of the project, so for the rest of the article I will only detail the scripts used. With this, we should be able to change scene by clicking on the button. However, it didn't work. I did a lot of research on the Internet, and I realized that I had to add my new scenes (SelectVehicle and Informations) in the build settings. As soon as I did that, it worked very well.

Exit the game
For this main menu, I used the Close button to exit the game. The way it works is the same as above, I created a simple script that closes the game, and I put it on the button the same way as above. We don't have a way to check this in Unity so I don't know if it works, but it should in the AR headset.

Audio
This last part was done at the end of the project because it is a detail, but I added a background music. This part is really simple: I added an Audio Source to the scene, and I chose the mp4 file to put on it. I downloaded different musics associated to the scenes.

Informations Menu
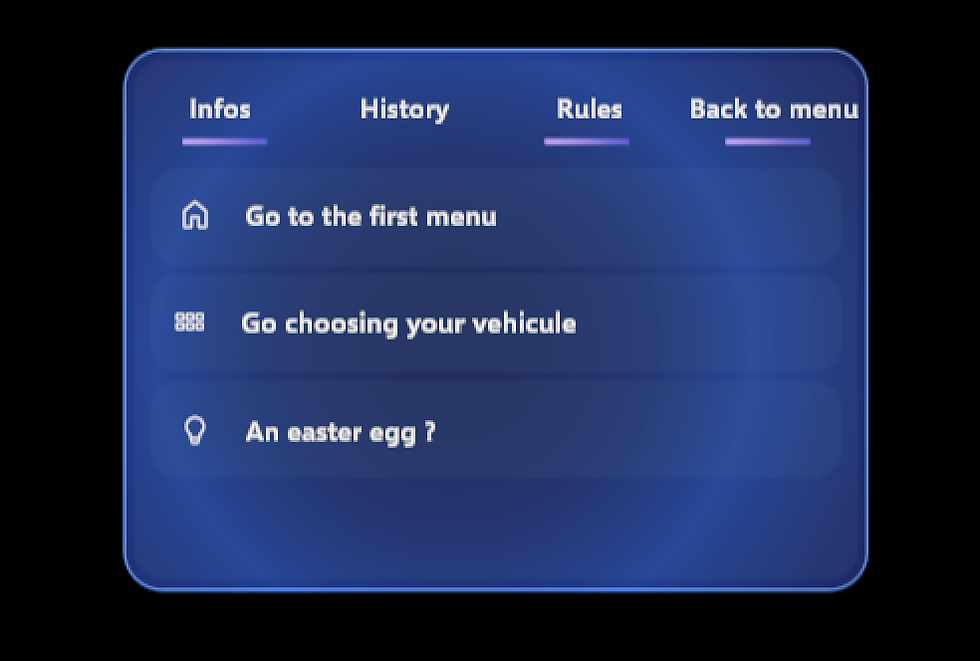
In this part, I will go fast because this menu works almost like the first one. This one has tabs that you can browse, each with a different content. The one I retrieved and which is integrated in MRTK worked well, but had various contents that I did not want (logos, images). To adapt it, I deleted all the contents, created four texts according to the tabs I wanted and superimposed them on the menu. I turned each tab into a button. The only difficulty here was to make the desired text appear according to the tab clicked. To do this, I did not use a script, but a feature already integrated in Unity. I made the four texts invisible. For each button, I configured the OnClick() area this way: I put the four texts as four elements, and the associated function was not a script, but the Enable function. For each button, I tick the Enable option for the desired text, and I untick for the other three. Thus, each button made appear the text I wanted, and disappear the other three.

Otherwise, I added buttons in order to go back to the Main Menu, or to go to the Vehicle Selection Menu (and even to a little easter egg !) that works like for the last part (with the SceneManager.cs script).
Vehicle Selection Menu
The last menu of my game is this one, where we can choose our vehicule, linked to the level. As long as I wanted to duplicate one level with one gameplay, but with different vehicules: I chose to keep a plane, a rocket and a boat. This is the central point for all the activities. It works globally like the other menus, with buttons that can change the scene. Here, we have many scenes so I used triple buttons for each level. One leads to the game itself, one to information about the level, and the last one to nice little bonus animations to see in augmented reality. The operation is similar to what we have seen before, but we can change the icons by going inside the settings.

Rotating 3D Models
The new issue in this menu, however, was the addition of rotating 3D models. When you put it that way, it may sound easy to do. However, it took me a little while and I'll explain why.
First of all, as we didn't really have time to create the vehicles ourselves, I went to the Free3D website to find the ideal and free models I needed. I had some problems because sometimes the textures were missing, or the format was incompatible. But I managed to find what I needed.
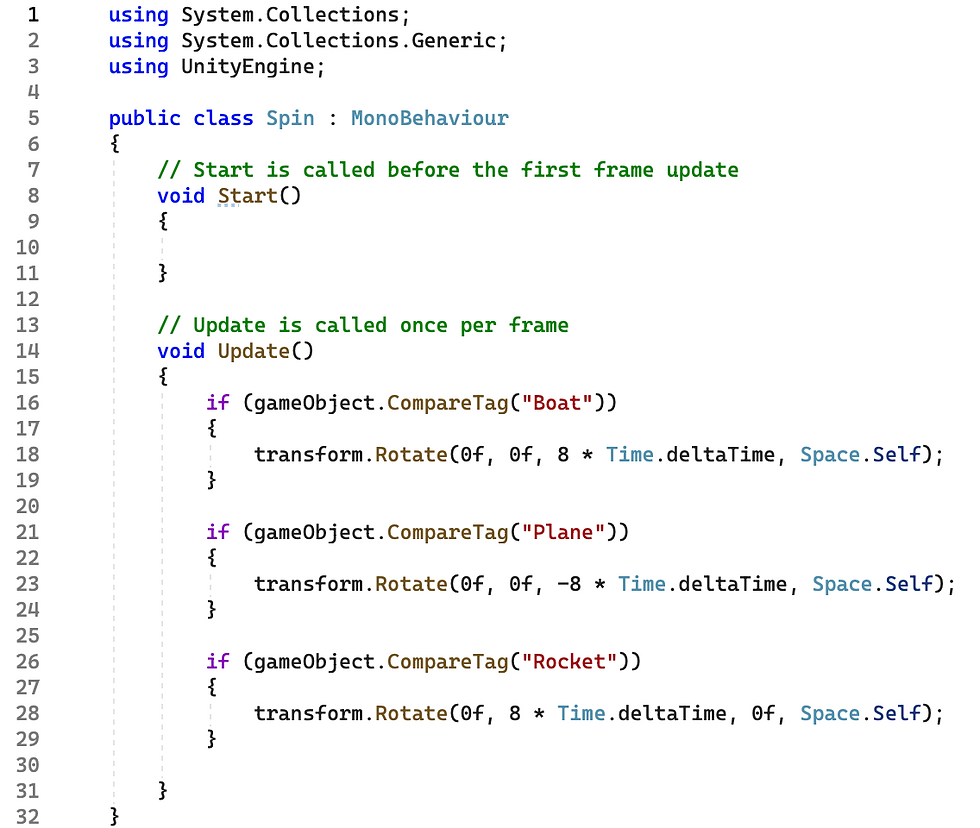
So I created a folder to put the templates in, placed them in the menu and managed to put them in the right place, it wasn't too complicated. However, to make the menu look nice, I wanted to create a script to make the vehicles run. This script is not complicated, but downloading the models from the internet caused a problem: the rotation axes are not the same. So one script added to the three models will not give the same rendering, the vehicles will not turn in the same direction. To solve this, there were two solutions. The first one would have been to create three different scripts, but this is not ergonomic. The other solution I chose was to use tags. I created three tags (rocket, plane and boat), and I differentiated the script according to the tag with if conditions. This worked very well, and the code was cleaner.
Games
This part is the most important of this application, and also the most complex. I will not describe separately the three levels, because I just duplicated the original one and changed the design (and the difficulty). I will also not enter into detail for the things that I already described, like the buttons and the audio.
Environment and collectibles (+teleportation)
The first part of this game is to design the complete environment. I already designed games in Unity so this one was not really difficult. Also, this game has some similarities with the Roll a Ball project so it was easy to put in place. The longest part was to find the 3D models online, for the collectibles and the player. I already downloaded a large part for the Select Vehicule menu. I decided also to create a ground with textures on it (like a sky for example), to have a kind of board game. Finally, I added the commands, so a panel of buttons like for the different menus. This part is important, but is the easiest.
To complete the environment, I wanted my player not to go far away from this board, and to stay in our field of view. For this, I added empty elements around the stage. These are invisible, and composed of colliders in the form of walls.
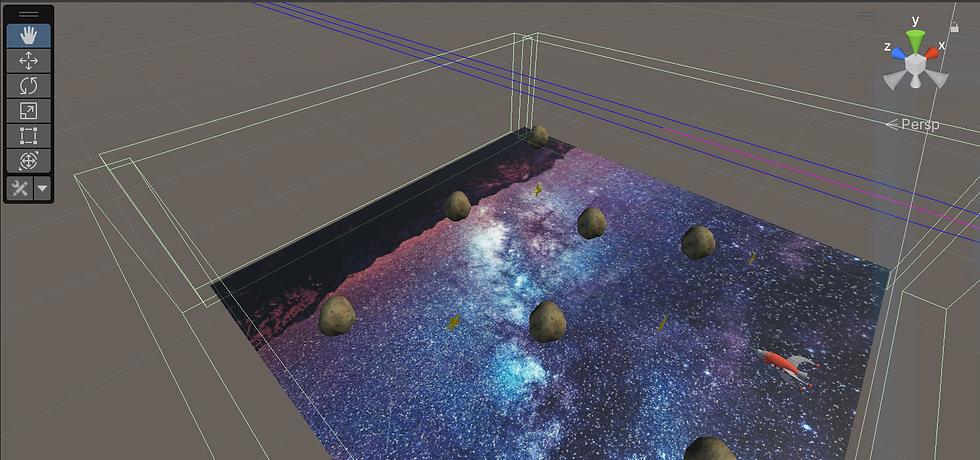
So, with the help of a teleportation script, we can put the player back to the starting position when he leaves the game area. This function is put into a PlayerManager.cs script, that will also be used after for the score part.

Finally, like the Roll a Ball game, I decided to add a spinning script to the collectibles. It is only for the aesthetic part. I created the Rotator.cs script and put it directly on the collectibles. However, like for the menu where we select the vehicule, some 3D models don't spin the same way so we have to compute different scripts according to the model. In this part, I didn't make the difference according to the tag like before, because the collectibles tags are already used for the score part (I will explain that later). So I have Rotator.cs, Rotator2.cs and Rotator3.cs to cover all the collectibles for all the levels.

Control system
Now that we have all the elements, we must make this game playable. In the Roll a Ball article, this part was really easy because the Input System was automatic (using the keyboard). However, in our case, we want our vehicule to move according to the button I press.
For that purpose, I took a panel with 6 buttons and put the right icons for the controls (back, front, left and right). Since I started my project on this part, I had a hard time doing this action. At first, I used the transform function to move the vehicle, but the movement was very jerky, and when you clicked, the vehicle stayed still at its new position. So it was not suitable. So I used the AddForce function, which allows you to give a rigidbody an impulse, and after a few mistakes I managed to make it work. Now I had to connect the action to the button, and we saw that for the menus.

To summarize quickly: I created four functions (one for each direction) which give an impulse in the desired direction. You can also adjust the strength according to the level (small impulse for an easy level, big impulse for a difficult level). These functions are then called by the buttons according to the one you choose. It works well!

However, if I press the left button, my vehicule goes to left without facing this direction. I need to add functions that are able to rotate the plane. This part is not very complicated, I created four functions and changed the rotation. However, as the vehicle models do not have the same axis of rotation between them, I was forced to use the tags to differentiate the desired direction. This was not difficult but a bit time consuming. In the end, for all three levels, we were able to have a correct animation. The attribution for the buttons is the same as for the moving part.

Score counter (win, loose)
Finally, to make the game fully work, I needed to add a score counter with different actions.
For the collisions, I created two tags: it will allow us to create events according to the nature of the object. For example, if the collectible is green, I give a "green" tag that will give one point to the player if there is a collision. If the collectible is red, I gave a "red" tag that will remove one point to the player.
To make the collectible disappear while being touched by the ball, I added some lines to the PlayerManager.cs script.

After that, I created a score text where we gain one point if we collect a green collectible, and we lose one point if we collect a red collectible.
For that purpose, I added an UI, so this is a canva where we can put a text on. I used Text Mesh Pro. If I want to change the score, I need to change the PlayerController.cs script and create a ScoreManager.cs script

This code (ScoreManager.cs) is composed of one function to increase the score, and one function to decrease the score. And we changed the PlayerManager.cs like that:
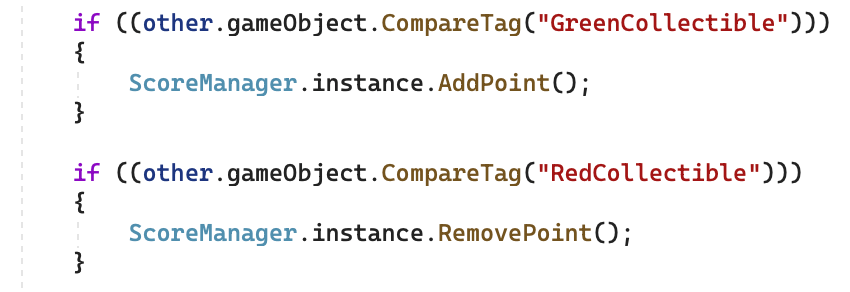
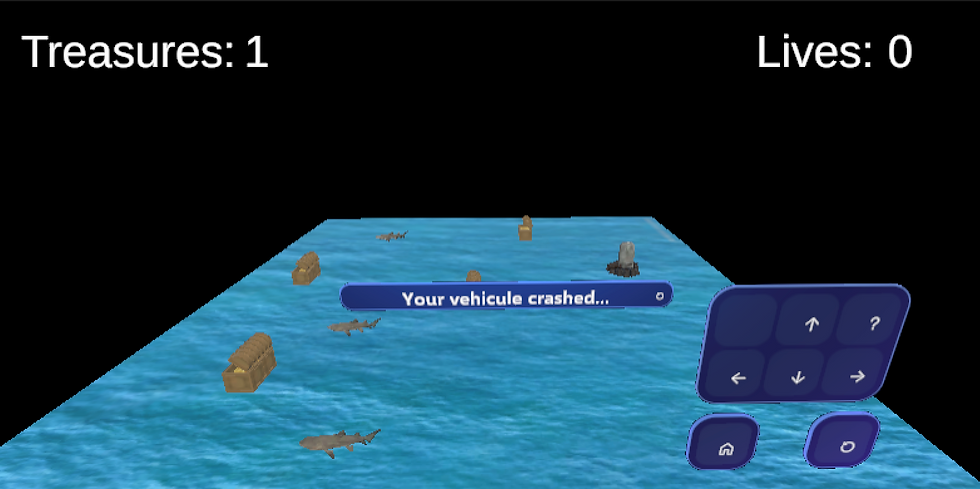
In this part, if the vehicle collides with a green tagged object, we use the AddPoint function in the ScoreManager.cs script. If the vehicle collides with a red tagged object, we use the RemovePoint function (to remove one life). The text in the canvas changes automatically thanks to that.
Finally, I added two things: if we score counter reaches a goal, I enable a winning panel. And if I lose my lives, the player vehicle is destroyed and replaced by a gravestone. Here is the code to do that:

The separation with the tags is because the gravestone had orientation problems according to the player 3D model. I had to split the different cases in order to have something nice.
And that's it for the games ! This part is the same for the three levels, with differentiation according to the rotations of some object, but globally it is the same. The differences are the speed of the vehicle, and the organization of the collectibles.
Bonus
I will quickly go through this part, because it is a bonus. For each vehicule, I decided to add a launch animation where you can watch a plane or a rocket fly. We can access these bonuses via the Main Menu.
For each one, I created a simple environment with a ground, a vehicule and a 3D object in the middle. I also added buttons, one to go to home menu and one to launch the animation.
After that, the process is simple.

I opened the animation window and created manually the animation for the vehicule. The keyframe system made this part really easy.

Now, we have a great animation which is looping. However, I want it to be triggered when I push the launch button. So I opened the associated animator, and created a default state. I added transitions to the animation, with a condition. To make it simple, I need to create a script that will be run if I press a button: if the button is pressed, the transition from default state to animation will be done. If I press again, it will restart.

To make that works, I created this script:

And it worked ! This is a simple bonus but in AR, it is really fun to watch.
Conclusion
To conclude this huge article, here is a demonstration of the game in video:

Commentaires